Minecraft is awesome. I also hate part of it with every fiber of my being.
Wait… backup, rewind. Let’s start at the beginning.
This is not a story about how amazing Minecraft is. It is also not an explanation for someone that doesn’t know what Minecraft is.
Honestly, if you aren’t aware of Minecraft at this point then skip this article altogether. However, if you are looking to get up and running with a dedicated home server and don’t know where to start or have started and find yourself stuck then you are at the right place.
So… Minecraft.
What an amazing game. I have spent countless hours placing simple blocks on a screen. It is amazing how such a simple concept can engross so many people and be so popular.
However, there is one aspect to Minecraft that I hate with a burning passion.
I. Hate. Minecraft. Mods.
If you don’t know what these things are then you should skip over this section.
In general, mods are collections of code and artifacts like image files that can change the game in different and sometimes meaningful ways. They might modify the look of some blocks. They might add some new creatures to the game. Some are simple. Some are incredibly complex.
My hat is off to anyone who spends their own free time developing these mods.
However, as cool as some of the mods are – when it comes to getting them up and running on a Minecraft server then this process usually is accompanied by massive frustration, confusing and scary websites, and, more often than not, tears.
We will get more into mods and the tears (usually my own) later on.
So we have an introduction to Minecraft.
Now what is this Docker thing?
The official description reads something like this (from Google): “Docker is a set of platform as a service products that use OS-level virtualization to deliver software in packages called containers. Containers are isolated from one another and bundle their own software, libraries and configuration files; they can communicate with each other through well-defined channels“
Yeah if you are like me and have kids waiting and wondering out loud every few seconds where their Minecraft server is… that doesn’t mean much. Let’s try that one again.
My interpretation reads something like this: “mini virtualized systems that can be started and stopped at will and that can run specific instances of code, applications, or OS’s in a generalized bucket that they call a ‘Container’. Docker can run on Windows, Linux, and other systems and provide common code execution no matter the host operating system.“
That is actually really, really cool – if it isn’t too hard to set up and use.
So now we have Minecraft and Docker established as our targets here.
One last thing…
Before describing the steps and time that it took to get this all up and running, I didn’t just jump into the deep end here and fight my way through everything on my own. It is time to give a big shout out to the hero of today’s article, Josh Barrett.
Josh writes a blog called Serialized.net with a LOT of good information on it. When getting ready to write this post I reached out to him asking for permission to link to his blog on this topic. He was happy to oblige.
One quick note – when writing blogs there is lots of information out there about linking to other sites. It is a measure of respect when I see another human Engineering their own space of the web to reach out and thank them for their work in helping me bootstrap my way to a solution and to ask if I can link to their work. So thank you Josh!
OK – now we are ready. The stage is set. Turn down the lights! Open the curtain! It is showtime!
Setting Up The Minecraft Docker Server On Windows
Step 1 – Read Minecraft Server in Docker: Adulting Made Easy
Estimated time: 5 minutes
When sitting down to figure all of this stuff out there were dozens of tabs open in my browser reading all about this, that, and the other things. I am going to make this really easy for you.
Just. Go. Read. That. Post.
It has everything you need to get started – with one caveat. There is a LOT of info there. Don’t immediately get discouraged when the first reading doesn’t make sense. It didn’t for me but I made it through. It will make sense to you later on.
Once you have read it, leave that page open as you will probably need to refer back to it often over the next few minutes.
One last important note for step 1 – it doesn’t appear to be called out, but the NUC that is mentioned in that article appears to be running some Linux variant. Some of the screenshots show bash running and other reference creating an alias for things. These are not your typical Windows elements, so we will make an assumption that Linux is in use here.
As my older server is just an old PC with an i5 processor, 16GB of RAM, and a simply copy of Windows10, all of the remaining steps will be focused on that OS. You can get this stuff up and running in Windows, but don’t need to.
Step 2 – Download Docker for Windows
Estimated Time: Unknown (depends on your internet speed)
Go here. Download this: Docker Desktop On Windows
At the time of this writing, it looks like this:
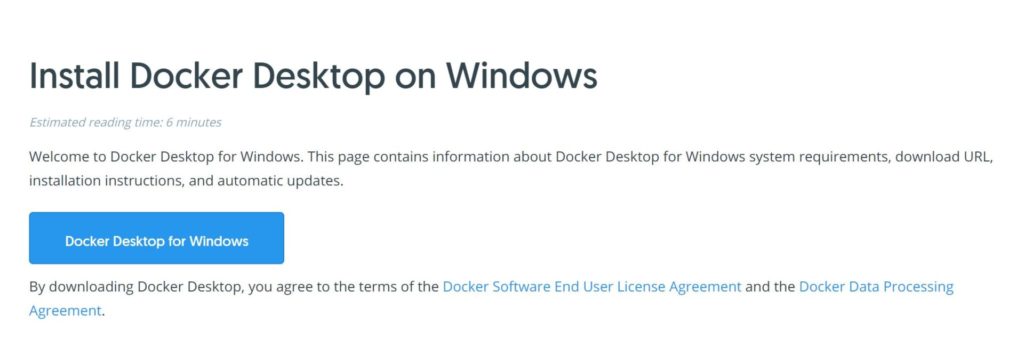
Also, at the time of this writing, the installer file is ~532MB. Go get it downloaded.
Step 3 – Install Docker For Windows
Estimated Time: < 10 minutes
Not much to call out here, other than the WSL2 stuff. It is a pretty straightforward install for the most part.
Oh, what is WSL2? As Microsoft puts it, WSL is “Windows Subsystem for Linux lets developers run a GNU/Linux environment — including most command-line tools, utilities, and applications — directly on Windows, unmodified, without the overhead of a traditional virtual machine or dualboot setup.“
Docker needs this. The installer helps you enable it. There is more info at the Microsoft link above if you want to dig deeper. This shows up as soon as you double click the exe:
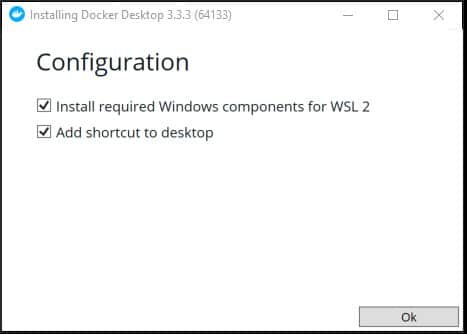
After selecting OK there is a bunch of additional downloading and unpacking of stuff. Just sit back and relax. Now is a good time to keep reading if you want to find out more information on some of these topics.
One note – in my most recent install I had a warning that my “WSL 2 installation is incomplete“. It provided this link with a WSL2 Linux kernal update: Install WSL on Windows 10
Once you are done with this install, reboot. It should ask you to, but in case it doesn’t, a reboot is important to ensure that everything is configured correctly.
Step 4 – Using Docker
After rebooting, opening Docker shows this nice looking interface:
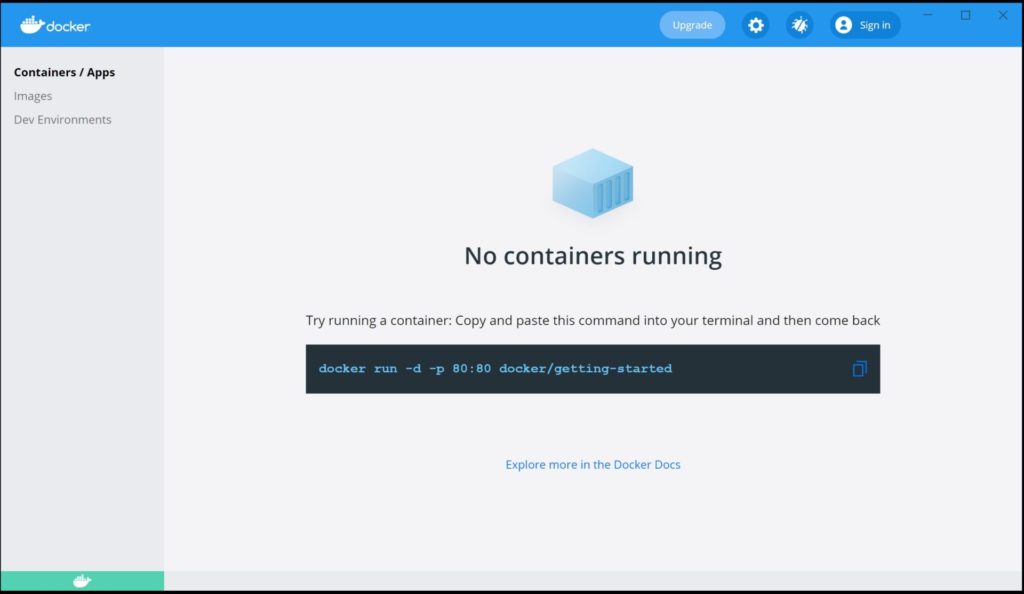
At this point there is good news and bad news!
The good news is that you are ready to go.
The bad news is that you actually can’t do much from this interface, at least not until you actually get some containers up and running. That action happens on the command line.
So fire up a command prompt. If you aren’t sure how to do this, go to your start menu and type in: cmd then hit enter.
Before we try and fire up a Minecraft Docker instance, let’s try out the getting-started image mentioned in the app itself. Copy the command: docker run -d -p 80:80 docker/getting-started then paste it in your Command Prompt and hit enter.
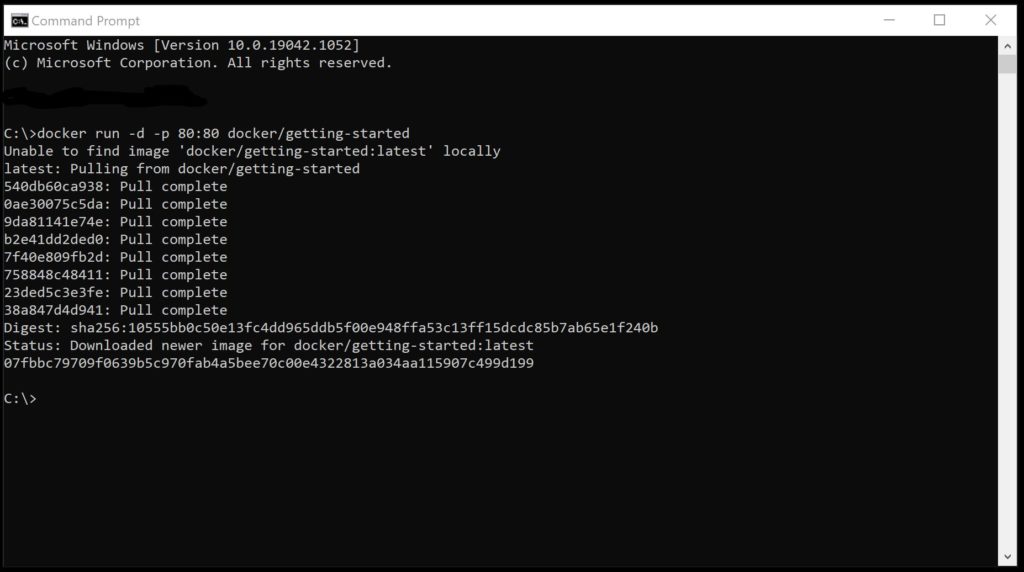
So what is happening here?
We are running a Docker command to start a specific image. Docker goes out and downloads the image then sets it up and starts the image container.
Now go check out the Docker Desktop app.
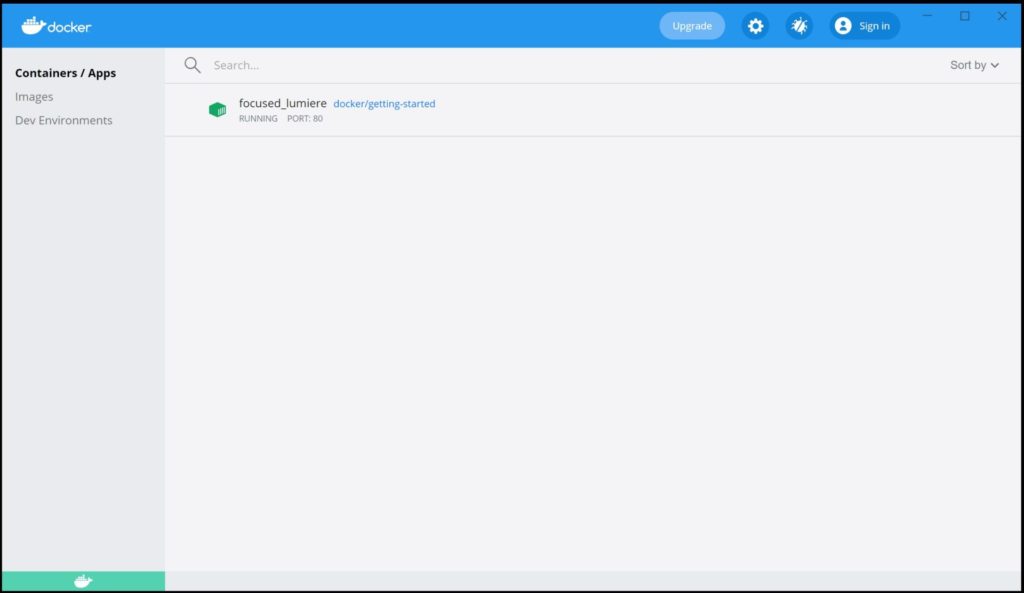
Even if you are skimming through this section to get to the good stuff about running Minecraft, stop for a second. There are a few things you need to know here.
First – clicking on the container name brings up the logs for the container. These will be handy later. Also, if you take the time to run this getting-started image then you get a very nice little tutorial webpage. If you hover over the line in the app for the container then icons will show up to the right. One of these is ‘Open in Browser’ which will launch http://localhost/tutorial/ which has all kinds of information on Docker, the flags used in the command line statement and lots of other information. Neat!
Remember these icons on the Docker app as they also allow you to stop and start your Docker containers.
Step 5 – Starting a Vanilla Minecraft Server
And we are finally here! If you have made it this far then you are a few minutes away from having your own personal Minecraft server up and running in Docker.
We are going to start with the Minecraft Docker image suggested in the Adulting Made easy article from Step 1: itzg/minecraft-server.
You can read more about this on the docker hub and in the github repository.
You only need one command to run this, but we need to setup a few things first.
To keep things nice and clean and easy, setup a dedicated Minecraft folder. I like to make one called mc on my C: drive as that makes running commands super simple. Inside this, make a folder for each docker instance. Also, as you may want to make multiple containers, labeling the folder with the server name and target port makes it easier to find things down the road.
To make this easier, you can do all of this from the Command Prompt! Copy and paste these lines in and run each one.
cd C:\

mkdir mc

cd mc

mkdir vanilla_25565

cd vanilla_25565

mkdir data
Note – you don’t necessarily have to create folders like this, but this puts your minecraft server installation into a known and dedicated folder named vanilla_25565. The 25565 is added on there as it is the port number that you will use to connect to to this server, so it is handy to have readily available.
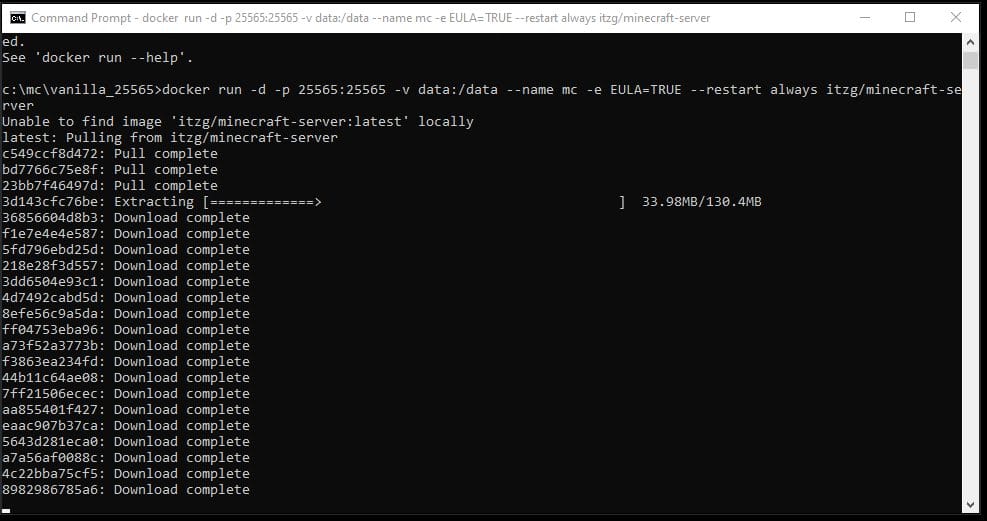
Now we are ready to start! Here is the command to run in the Command Prompt.
docker run -d -p 25565:25565 -v data:/data --name mc -e EULA=TRUE --restart always itzg/minecraft-serverYou should see a bunch of stuff happening in the command window. It will download the image and unpack it. It will look something like this:
Once everything is downloaded and running, your Docker Desktop should provide a welcome sight:
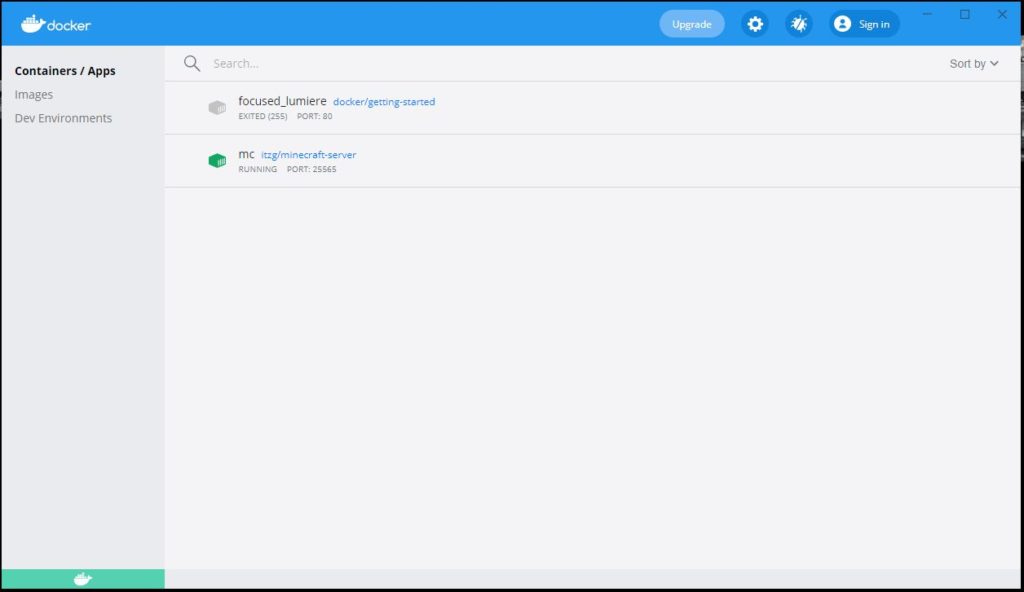
You can click on the mc container and see the logs for the server, which will hopefully show the server starting up and creating your new world.
Step 6 – Login and Have Fun
The last step is to jump into Minecraft. It is time to connect to your server.
Start Minecraft on the latest version and go to the Multiplayer connection options. Here, you can Add a Server or start a Direct Connection.
Type in the IP address of your PC running Docker and the port number (remember your folder name?) like this: ip_address:port. It will look like this:
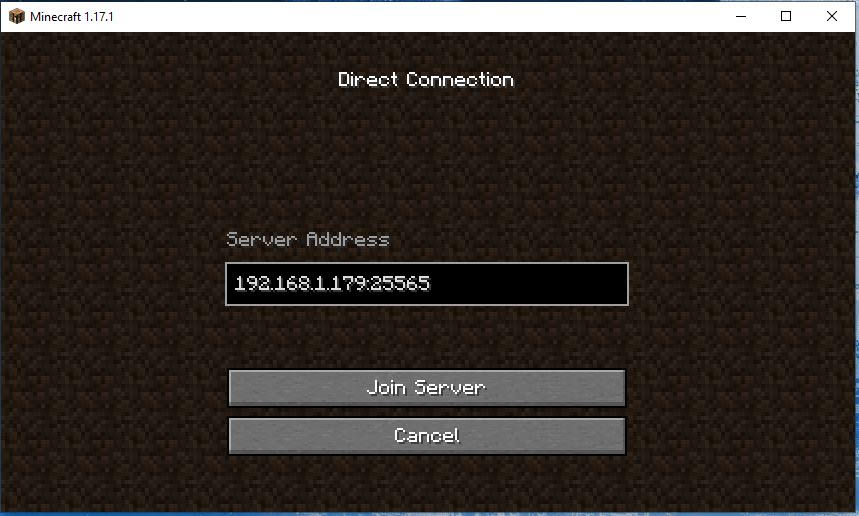
Hit the Join Server button and watch your Minecraft server materialize around your character.
Now go have fun!
In Part 2 we will cover using docker-compose to setup multiple different servers as well as adding mods to a server.
But right now you have some building to do!
Thanks for reading!

Comments are closed, but trackbacks and pingbacks are open.